Automotive Bolts and Screws Manufacturing Process

The manufacturing of automotive fasteners goes through five core stages: material selection – forming – strengthening – finishing – validation. Each stage requires strict process parameter control to meet the automotive industry’s high requirements for accuracy, strength, and reliability. Below is a systemized technical explanation of each phase, including operations, equipment, and quality control checkpoints.
I. Raw Material Preparation: Foundation from Selection to Pretreatment
The quality of raw materials directly determines the final performance of fasteners. This stage covers material selection – composition testing – pretreatment.
1. Material Selection and Screening
- Steel choice: For example, Q235 low carbon steel for grade 3.6 screws, 45# medium carbon steel for grade 8.8 structural bolts, SCM435 alloy steel for grade 10.9 high-strength bolts, and TC4 (Ti-6Al-4V) alloy for titanium fasteners.
- Quality inspection: Spectrometers are used to test chemical composition (e.g., carbon content in 45# steel must be 0.42%–0.50%). Eddy current flaw detectors check surface defects such as cracks and folds; unqualified wire rods are rejected.
2. Pretreatment Process
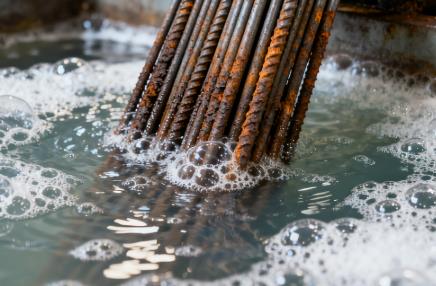
- Rust removal and degreasing: Wire rods are pickled in hydrochloric acid (15%–20%), then degreased in alkaline solutions at 50–60℃ to remove oxides and oils.
- Phosphating: Creates a 5–10μm phosphate layer to improve lubricant adhesion. Eco-friendly phosphate-free conversion coatings are used to meet RoHS requirements.
- Wire drawing: Multi-pass drawing machines reduce wire diameter to ±0.01mm precision. Cold work hardening increases tensile strength by 15%–20%. Low-temperature annealing at 200–300℃ relieves internal stress.、

II. Forming Process: Precision Cold Heading and Hot Forging
Forming shapes the bolt head and shank. Depending on size and material, cold heading or hot forging is used.
1. Cold Heading (for ≤24mm fasteners)
- Equipment: Multi-station cold headers (4–6 stations), output 300–800 pcs/min.
- Steps: Cutting, pre-heading, final heading, and punching (for recesses like hex or Phillips). Dimensional tolerances must be controlled to ±0.02mm.
- Quality control: Vision systems detect cracks, burrs, and incomplete heads with ≥99.5% accuracy.
2. Hot Forging (for >24mm or high-strength bolts)
- Heating: Induction furnaces heat billets to 850–1200℃, with temperature uniformity within ±30℃.
- Forging: Hot forging presses (500–2000T) form heads in one step with graphite-based lubricants to prevent sticking.
- Cooling: Rapid water spray cooling (10–15℃/s) minimizes oxidation. Shot blasting removes oxide scales, ensuring Ra ≤6.3μm surface roughness.
III. Thread Processing: Precision Load-Bearing Structure
Threads transmit preload and require accurate forming for strength and smooth assembly.
1. Rolling and Threading
- Thread rolling: Radial or axial thread rolling machines plastically deform the shank using hardened dies. Efficiency: 200–500 pcs/min; precision: accumulated error ≤0.05mm.
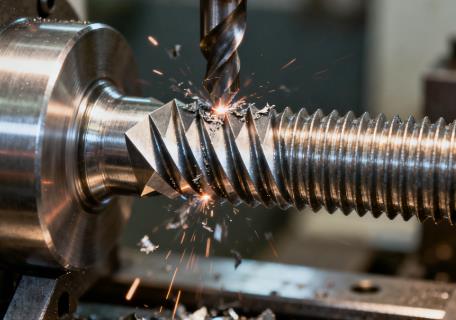
- Thread tapping for self-tapping screws: Thread plates cut sharp edges with precision angle (60°±1°) and tip radius R0.1mm, enabling penetration into materials. Efficiency: 1000–2000 pcs/min.
2. Quality Inspection
- Gauging: Go/No-Go gauges check pitch diameter and major diameter (e.g., M10×1.5 bolts must pass go-gauge fully, no-go gauge partially ≤3 threads).
- Surface inspection: Metallographic microscopes ensure no cracks/folds. Roughness Ra ≤3.2μm to avoid seizing.

IV. Heat Treatment: Strengthening Mechanical Properties
1. Standard Quenching and Tempering
- Quenching: Continuous furnaces heat bolts (820–950℃), then quench in water-based media (8.8 grade) or oil (≥10.9 grade). Cooling rates must be controlled to prevent cracking.
- Tempering: Performed within 1 hour of quenching. Temperatures range 320–450℃ depending on grade. Hardness: 22–32HRC (8.8), 28–36HRC (10.9).
2. Special Treatments
- Carburizing: Provides hard surface (58–62HRC) with tough core (30–40HRC) for set screws.
- Aging: Titanium bolts undergo aging at 500–550℃ to improve tensile strength >900MPa.
3. Heat Treatment Quality Control
- Hardness testing (Rockwell, Vickers).
- Metallography to verify proper sorbite structure.
- Mechanical testing (tensile, yield, fracture location analysis).
V. Surface Treatment: Corrosion Resistance and Assembly Adaptability
| Process | Details | Applications | Performance |
|---|---|---|---|
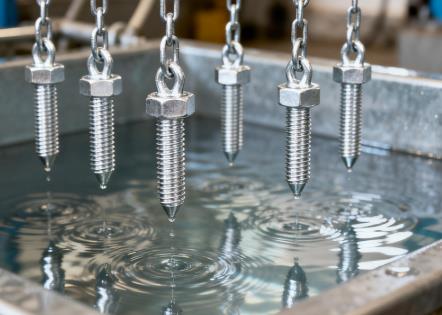
| Electro-galvanizing | Zn layer 8–12μm, passivation treatment | Interior screws, non-visible bolts | ≥48h salt spray |
| Dacromet | Zn-Al coating, cured at 300–320℃ | Chassis, suspension bolts | ≥500h salt spray, 300℃ heat resistance |
| Zinc-nickel alloy | Zn 15–20g/L, Ni 8–12g/L | Engine, exhaust system bolts | ≥1500h salt spray, 400℃ resistance |
| Phosphating | 3–5μm Zn phosphate film | Body bolts under paint | Adhesion ≥5MPa |
Quality Checks
- Coating thickness (±2μm tolerance).
- Adhesion (cross-cut test, ≤5 grid loss).
- Corrosion resistance (ASTM B117 salt spray tests).
VI. Final Inspection and Packaging: Comprehensive Quality Assurance
1. Final Testing
- Full dimensional check with CMM (±0.005mm).
- NDT with magnetic particle inspection for ≥10.9 bolts.
- Assembly torque-angle testing (e.g., M10: 50N·m + 90°).
2. Packaging
- Inner: anti-rust paper, static-free bags.
- Outer: corrugated cartons ≤25kg, foam partitions, marked with specs and batch numbers.
- Traceability: cards with material heat number, furnace batch, inspection reports.
Through these six meticulously controlled stages, automotive bolts and screws achieve dimensional precision ±0.02mm, 100% strength compliance, and corrosion resistance meeting vehicle lifetime requirements, ensuring reliable performance in all automotive applications.